Having a car that’s properly illuminated is essential for safe driving, both for your own protection and the safety of others on the road. One of the most common car problems is a burnt-out headlight. This seemingly minor issue can significantly impact your visibility at night, increasing the risk of accidents. If you notice that one of my headlights is out, don’t delay in addressing it.
This article will guide you through the process of safely replacing a burnt-out headlight. We’ll cover the telltale signs of a faulty headlight, essential safety precautions, step-by-step instructions for replacement, and tips for choosing the right bulb and ensuring proper alignment. By following these steps, you can restore your vehicle’s lighting system and drive with confidence.
Symptoms of a Burnt-Out Headlight
Recognizing the symptoms of a burnt-out headlight is crucial for prompt action. Here are some common indicators:
- Dim or Flickering Light: If your headlight appears significantly dimmer than the other one or flickers intermittently, it’s a strong indication that the bulb is nearing its end.
- Complete Darkness: The most obvious sign is when one headlight is completely out, leaving you with reduced visibility.
- Burnt-Out Appearance: Inspect the headlight bulb itself. If you see a blackened or melted filament, it’s definitely burnt out.
Safety Precautions for Headlight Replacement

Replacing a headlight bulb may seem straightforward, but it’s essential to prioritize safety. Here are some crucial precautions to follow:
- Park Safely: Always park your vehicle on a level surface, engage the parking brake, and turn off the engine before starting any work.
- Disconnect the Battery: To prevent electrical shocks, disconnect the negative terminal of your car battery.
- Wear Protective Gear: Wear safety glasses to protect your eyes from debris and gloves to prevent burns from hot components.
- Allow Bulbs to Cool: If you’ve recently driven, allow the headlight assembly to cool down before handling the bulb.
How to Replace a Headlight Bulb
The process of replacing a headlight bulb varies slightly depending on your vehicle model. However, the general steps are as follows:
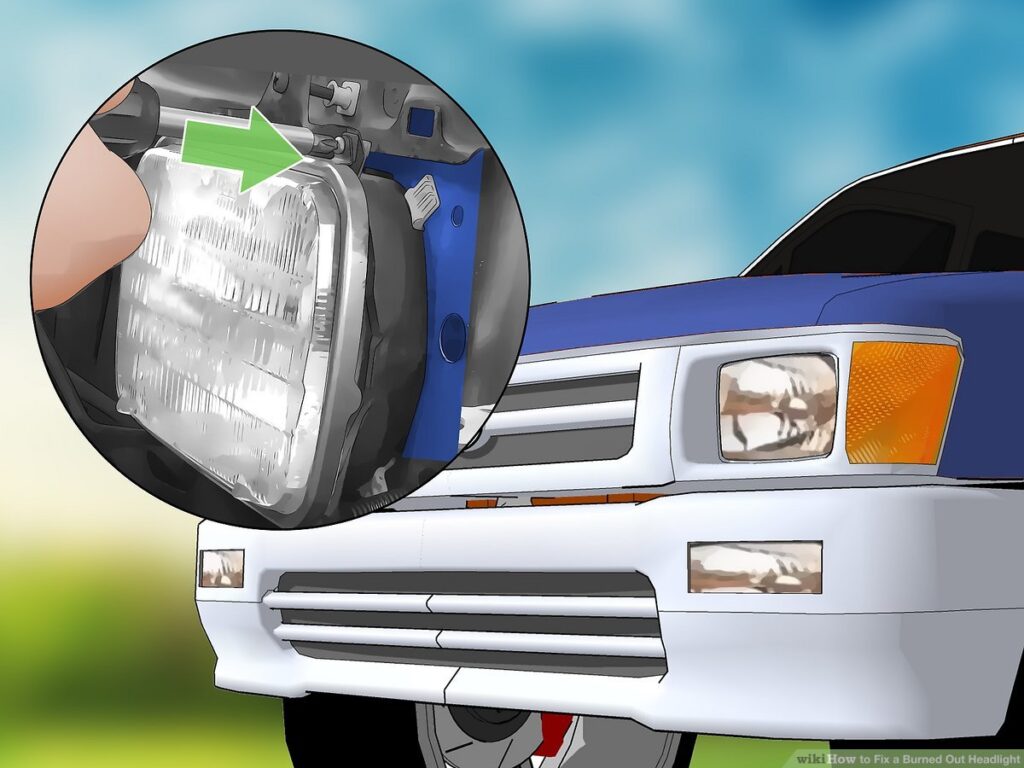
- Access the Headlight Assembly: Locate the headlight assembly and carefully remove the dust cover or lens. This may involve unscrewing a few bolts or clips.
- Disconnect the Wiring Harness: Unplug the electrical connector from the back of the headlight bulb.
- Remove the Old Bulb: Gently twist or pull the old bulb out of its socket. Be careful not to touch the new bulb’s glass with your bare hands, as oils from your skin can shorten its lifespan.
- Install the New Bulb: Insert the new bulb into the socket, ensuring it’s properly seated. Twist or push it in until it locks securely.
- Reconnect the Wiring Harness: Plug the electrical connector back into the new bulb.
- Reassemble the Headlight Assembly: Replace the dust cover or lens and secure it with the bolts or clips.
Choosing the Right Headlight Bulb

Selecting the correct headlight bulb is crucial for optimal performance and safety.
- Check Your Owner’s Manual: Your vehicle’s owner’s manual will specify the recommended bulb type and wattage.
- Consider Bulb Type: Headlight bulbs come in various types, including halogen, HID (high-intensity discharge), and LED (light-emitting diode). Halogen bulbs are the most common and affordable, while HID and LED bulbs offer brighter light output and longer lifespans.
- Match Wattage: Ensure the new bulb’s wattage matches the original bulb’s wattage. Using a bulb with a higher wattage can damage your vehicle’s electrical system.
Headlight Alignment After Replacement
After replacing a headlight bulb, it’s essential to ensure proper alignment. Misaligned headlights can blind oncoming drivers and reduce your visibility.
- Check Alignment: Park your vehicle in front of a wall or garage door and turn on your headlights. Observe the beam pattern and adjust the aim if necessary.
- Use Adjustment Screws: Most headlight assemblies have adjustment screws that allow you to fine-tune the beam direction. Refer to your owner’s manual for specific instructions.
- Professional Alignment: If you’re unsure about adjusting the headlights yourself, consider taking your vehicle to a professional mechanic for alignment.
Conclusion
Replacing a burnt-out headlight is a relatively simple task that can significantly improve your driving safety. By following the safety precautions outlined in this article and carefully following the replacement steps, you can restore your vehicle’s lighting system and ensure optimal visibility on the road. Remember to choose the right bulb type and wattage and to check the headlight alignment after replacement.