Moving can be stressful, but ensuring your internet connection remains seamless shouldn’t add to the chaos. You can easily transfer your existing router to your new house and continue enjoying reliable Wi-Fi access. This guide will walk you through each step, from compatibility checks to configuring your network settings for optimal performance in your new home.
This article will cover everything you need to know about moving your router, including checking compatibility with your ISP’s network, setting up the router in your new location, and securing your Wi-Fi connection. By following these steps, you can ensure a smooth transition and uninterrupted internet access in your new house.
Moving Router to a New House
Transporting your router is simple. Carefully pack it in its original box or a sturdy container with protective padding to prevent damage during the move. Label the box clearly as “Router” to avoid confusion during unpacking. Once you arrive at your new house, locate a central location for your router, ideally away from walls and metal objects that can interfere with the signal.
Remember to bring all necessary cables and accessories, including power adapters, Ethernet cables, and any antennas. Ensure these are also packed securely to prevent damage during transit.
Router Compatibility with ISP Network
Before setting up your router in your new house, confirm its compatibility with your Internet Service Provider’s (ISP) network. Check your router’s specifications or contact your ISP to ensure it supports the necessary protocols and technologies used by their network.
If you’re unsure about compatibility, consider contacting your ISP for guidance. They can provide information on compatible routers or assist you in configuring your existing router for their network.
Setting Up Your Router in a New Home
Once you’ve confirmed compatibility, follow these steps to set up your router in your new home:
- Connect the Power: Plug the power adapter into the router and a wall outlet.
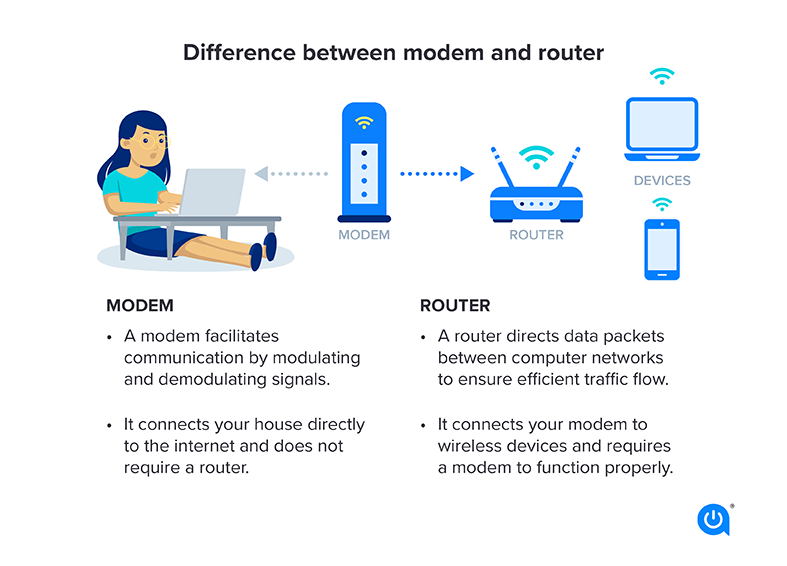
- Connect to the Modem: Use an Ethernet cable to connect the “WAN” or “Internet” port on your router to the “Ethernet” port on your modem provided by your ISP.
- Access Router Settings: Open a web browser on a device connected to your router’s Wi-Fi network and enter the router’s IP address (usually found on the bottom of the router). Log in using the default username and password (also typically found on the router).
Configuring Wi-Fi Name and Password
After accessing the router settings, navigate to the “Wireless” or “Wi-Fi” section. Here you can configure your network name (SSID) and password:
- Choose a Unique SSID: Select a descriptive name for your Wi-Fi network that is easy to remember. Avoid using generic names like “Linksys” or “Netgear.”
- Set a Strong Password: Create a strong password with a combination of uppercase and lowercase letters, numbers, and symbols. Avoid using easily guessable information like birthdays or pet names.
Security Settings
Within the Wi-Fi settings, ensure you select WPA2-PSK or WPA3 as your encryption protocol for maximum security. These protocols provide robust protection against unauthorized access to your network.
Secure Access in Your New Location
Once your router is set up and configured, take these steps to further secure your network:
- Enable Firewall: Activate the built-in firewall on your router to block unauthorized traffic from accessing your devices. 2. Update Firmware: Regularly check for firmware updates for your router and install them promptly. Updates often include security patches that protect against known vulnerabilities.
- Guest Network: Consider creating a separate guest network for visitors, limiting their access to your main network and sensitive data.
Conclusion
Moving your router to a new house is a straightforward process that can be completed with ease by following these steps. Remember to check compatibility with your ISP’s network, configure your Wi-Fi settings securely, and implement additional security measures to protect your network in your new location. By taking these precautions, you can ensure a seamless transition and enjoy reliable internet access in your new home.